08 Extended Functionality for Portal Operators
All functions in this chapter require SUPERADMIN authorization or access to the Google Cloud Console.
08.1 Creating a Bucket Browser
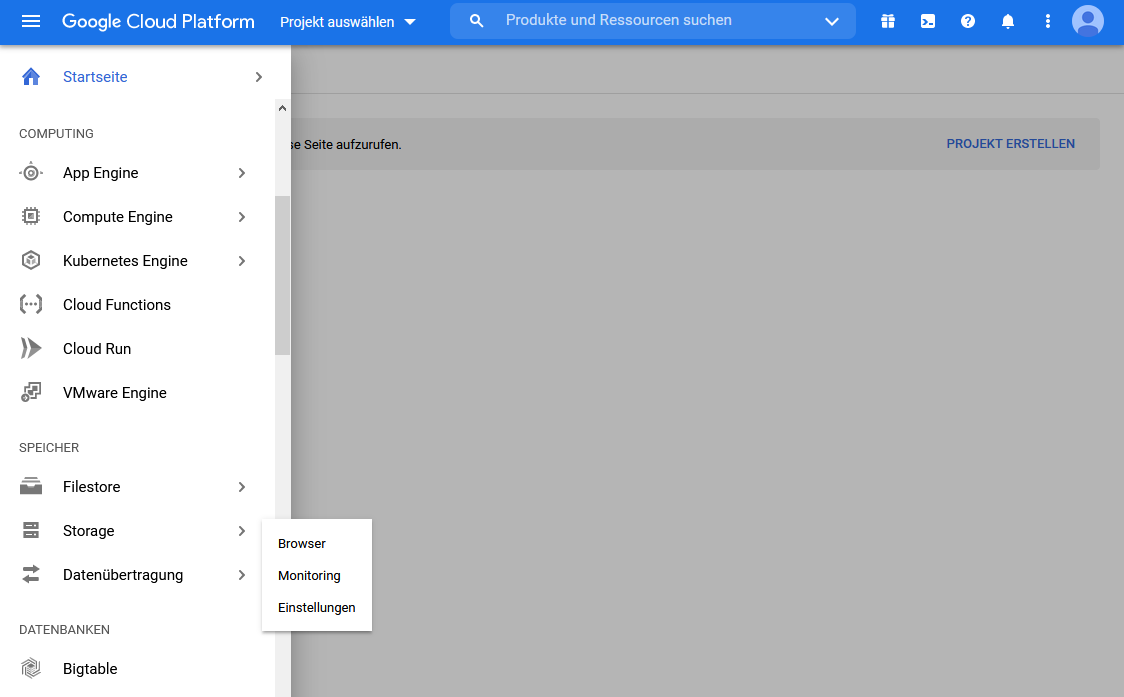
Open the Google Cloud Console at:https://console.cloud.google.com. Under Select Project, select the appropriate project for the portal. Then go to the navigation menu on the left. In the navigation menu, then under Storage, go to Browser.
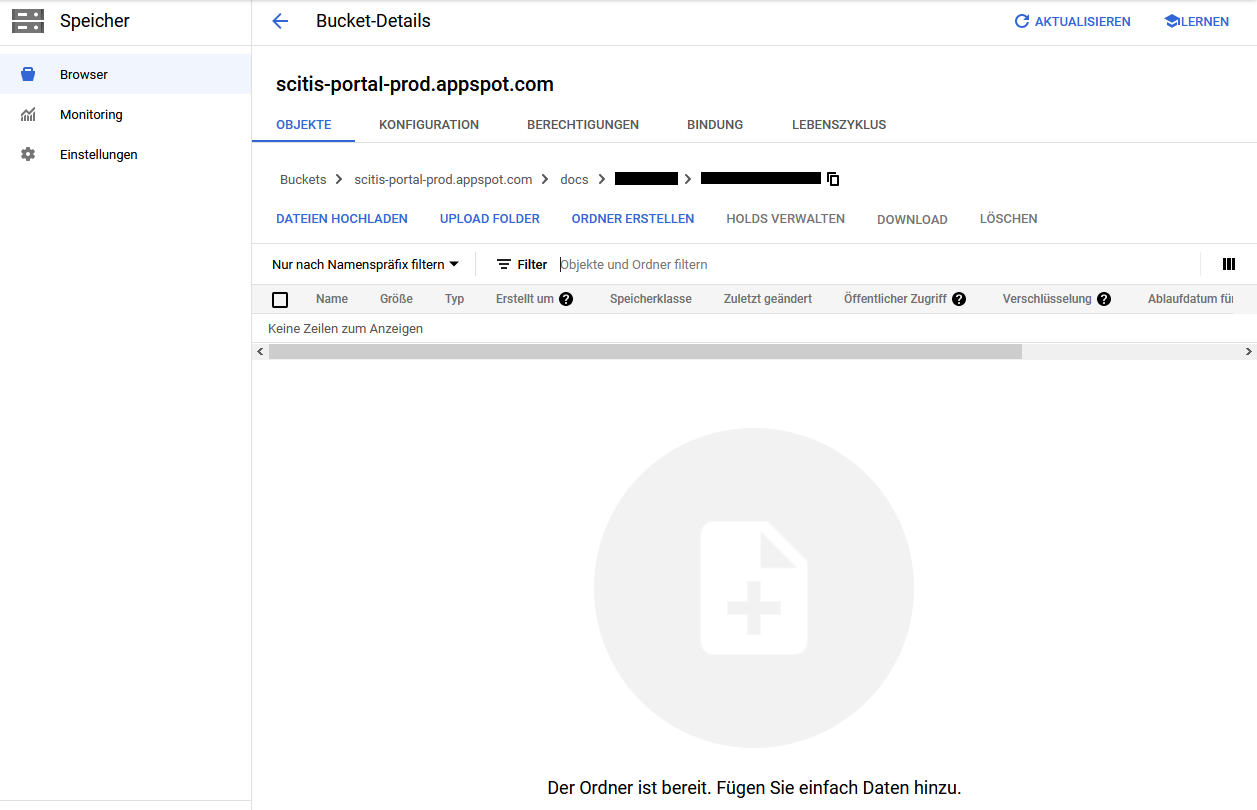
There you will find the locations of their various portals and projects. To locate the folder where the portal’s assets are stored, the folder is named as follows, ‘Portal Name’.appspot.com. There you will now find a folder named ‘docs/’. This folder is created automatically when the portal is created. In the docs/ folder you will find the different created customers with their customer IDs.
In the Google Cloud Console, open the corresponding customer folder, in the customer folder there are the asset folders named with the asset ID, also open the corresponding asset folder here. Now you are in the folder that the bucket browser of the asset has access to.
You can now load your data or folders into the Bucket Browser via drag & drop or via file upload or upload folder. The folder or data structure you create here is also created in the Bucket Browser of the asset.
08.1.1 Depositing documentation in the help area
Open the Google Cloud Console at: https://console.cloud.google.com. Under Select Project, select the appropriate project for the portal. Then go to the navigation menu on the left. In the navigation menu, under Storage, click on Browser (see illustrations in Creating a Bucket Browser). There you will find the locations of your various portals and projects. To locate the folder where the portal assets are stored, the folder is named as follows ‘Portal name’.appspot.com. There you will now find a folder named ‘documentation/’, open this folder. All data you store in this folder will be displayed in the help section under documentation in the portal. As with the Bucket Browser, data can be moved to the folder via drag & drop or via file upload.
08.1.2 Setting up the pub/sub trigger action
Using, for example, Python scripts, complex analytics can be run on the incoming data, such as monitoring an overall condition that is dependent on multiple parameters. This could be, for example, when AI detects wear and tear or warns of a possible failure. To ensure that the results of this analysis are not lost unnoticed, the result can be published as a pub/sub message. Then a subscription and trigger action can be set up so that an email is sent, for example. The following are the steps involved:
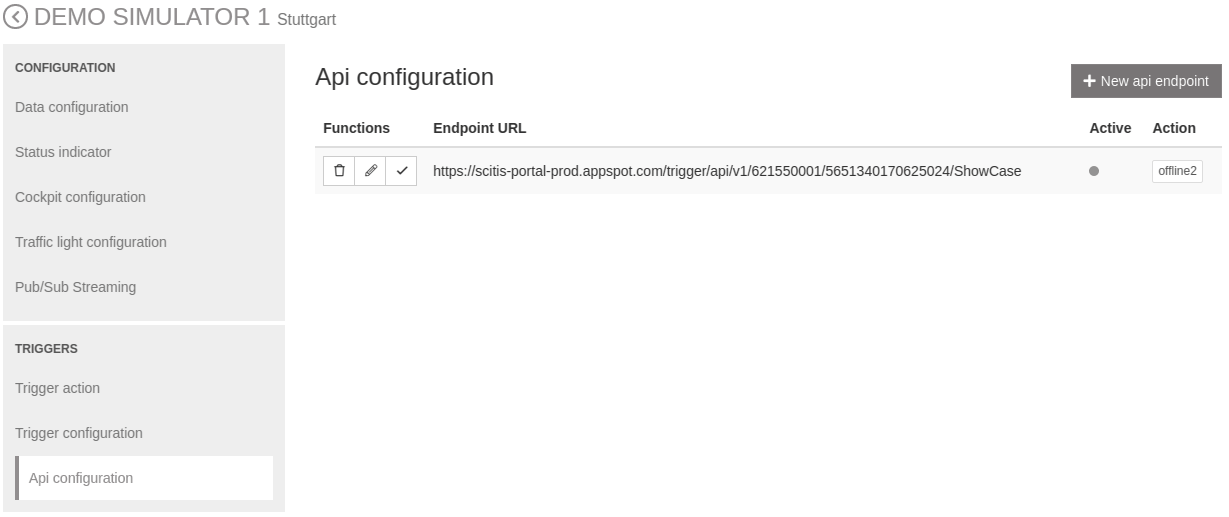
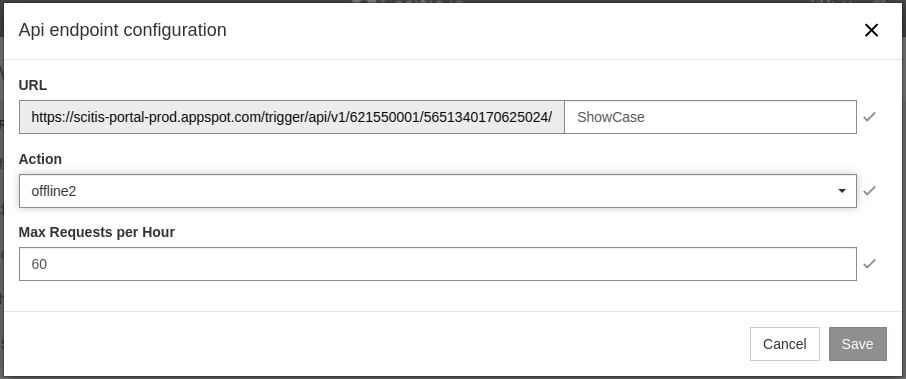
- Set up endpoint in API configuration: In the asset configuration, there is a tab called API Configuration where a new API configuration can be created under New API Endpoint. If an API configuration is to be created, it must be given a URL extension and an action must be selected that is to be executed when it is activated. Additionally, the maximum number of requests per hour can be set.
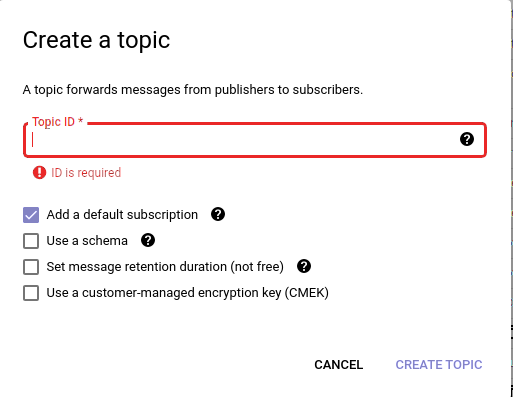
- Create pub/sub-topic with parameters: You can create a new topic in the GCP console under Pub/Sub. This topic will publish a message that can be used to trigger an action. For this, you assign an ID for the new topic.
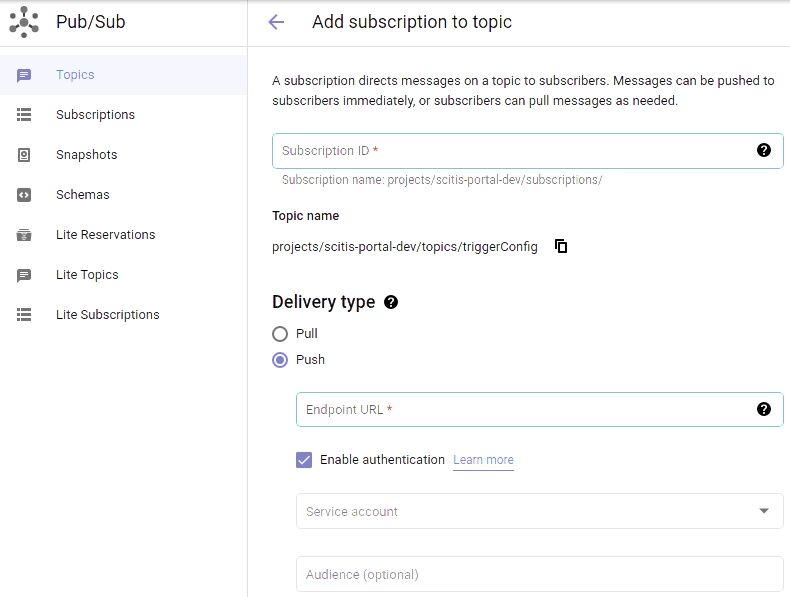
- Set up push subscription in pub/sub configuration: Once a topic has been created, then in the GCP click on the ID of the pub/sub topic created, on this page (topic details) scroll down to ABOs, there open the CREATE ABO drop-down menu and click on Create Subscription. To add the subscription, you must first select a subscription ID to listen to. Then for Delivery Type select Push type and for Endpoint URL enter the URL that was previously set in the API Endpoint Configuration.
IMPORTANT: The checkbox to enable authentication (Enable Authentication must also be set. Under Service account, the service account of the project must be selected and at Target group trigger.api must be entered. Then save and switch back to the API configuration of the portal.
- Publish message in pub/sub topic (e.g. via Python code): A message can be published via Python code, for example. In this message, parameters can be created in the json-file. These are forwarded to the corresponding trigger action via the pub/sub topic (see figure below).

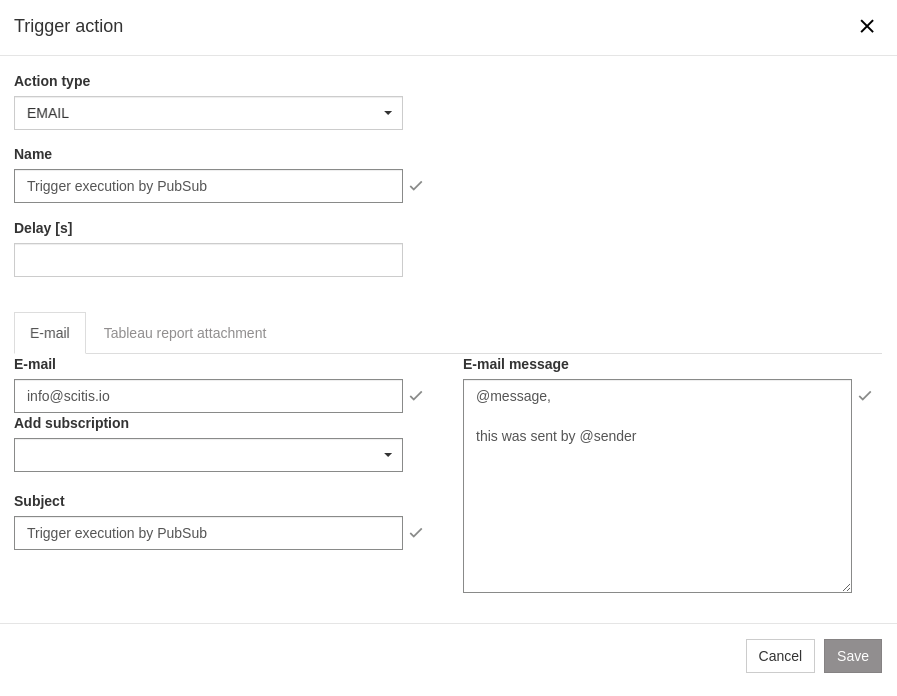
- Set up trigger action: Under Trigger Action in the asset configuration, a trigger action can be selected, such as email. In the message body, the parameters of the pub/sub topic can be inserted with placeholders so that they are automatically replaced with the values from the pub/sub topic.
- Add trigger action to API endpoint: The created trigger action can now be added to the API endpoint in the asset configuration. The last step is to enable the endpoint using the checkmark icon.

08.1.3 Administration API / Gateway API
The Administration API allows you to create assets, gateways, asset groups and organizations from outside the portal with other systems, such as Salesforce. If you are interested in this feature, please contact us. A detailed documentation of the functions can be accessed via swagger. For this, you have to insert your portal URL in the following link. (This documentation is only accessible for users who have also been added to the GCP project).
- Administration API: https://portalURL/documentation/administration/administration.html
- Gateway API: https://portalURL/documentation/gateway/gateway.html
08.1.4 Portal-specific input fields for assets and gateways
When an asset or gateway is created, the portal specifies certain fields that must be filled in, such as Name, Category, Location, and Organization. However, there may be additional information that should be added and then available to users and stored. To enable this, there is a flexible definition of portal-specific fields - so-called metainformation. A schema configuration file is used to define the fields for gateways and assets. These are then added in the background and can be filled, e.g. via the administration or the existing asset API.
The following is the explanation of how new fields are added to the backend:
- Schema configuration file (JSON): In the schema configuration file, the new fields are created according to the schema shown below. The schema must be adhered to in order to ensure that the data is transferred correctly. You can define as many fields as you want, but extend the schema according to the template.
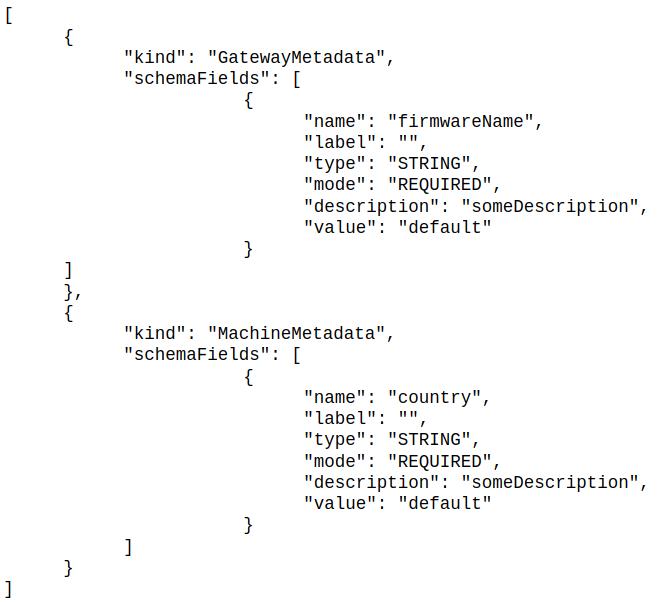
- name: can be freely chosen
- label: label that will be displayed in the portal interface
- type: data type, currently STRING, INTEGER, FLOAT
- mode: whether the field is required or not
- description: description, will be displayed in backend only
- value: default values can be stored, e.g. to create a dropdown menu in the frontend with default values
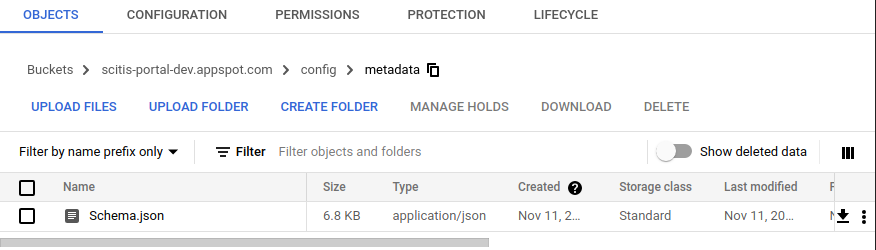
- Place JSON file in GCP project and make portal settings: The created JSON file must be placed in the bucket of the GCP project belonging to the portal. For this, in the GCP and Cloud Storage place the file in the following folder path: projectID.appspot.com / config / metadata
Additionally, in the general portal settings (managed by the portal operator), the corresponding setting for the JSON file must be made. Please contact your portal operator for details.
- Create assets and gateways using the API: When an asset or gateway is created, the new fields are automatically added to the datastore in the entity MachineMetadata or. GatewayMetadata and associated with the asset or gateway. Also, a new table ’Metadata’ is created in the asset’s record in BigQuery. This table contains all the information from the metadata fields for gateways and assets. If an entry is changed, a new row including the timestamp is added.
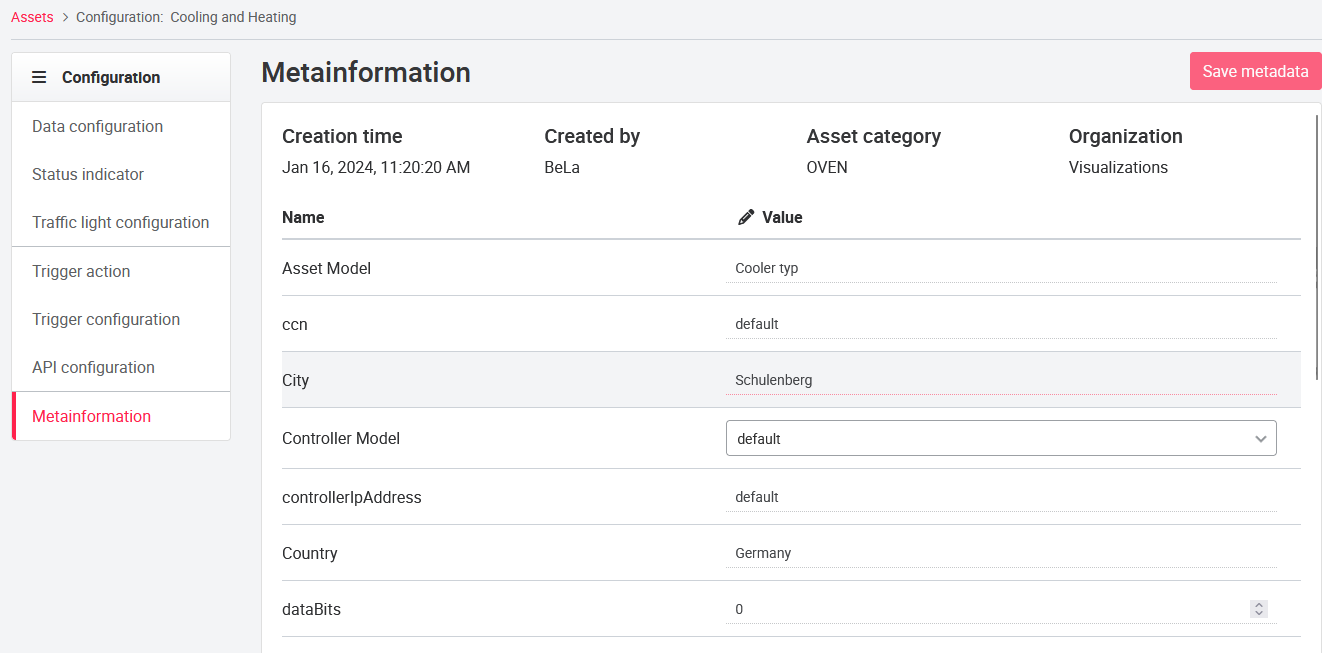
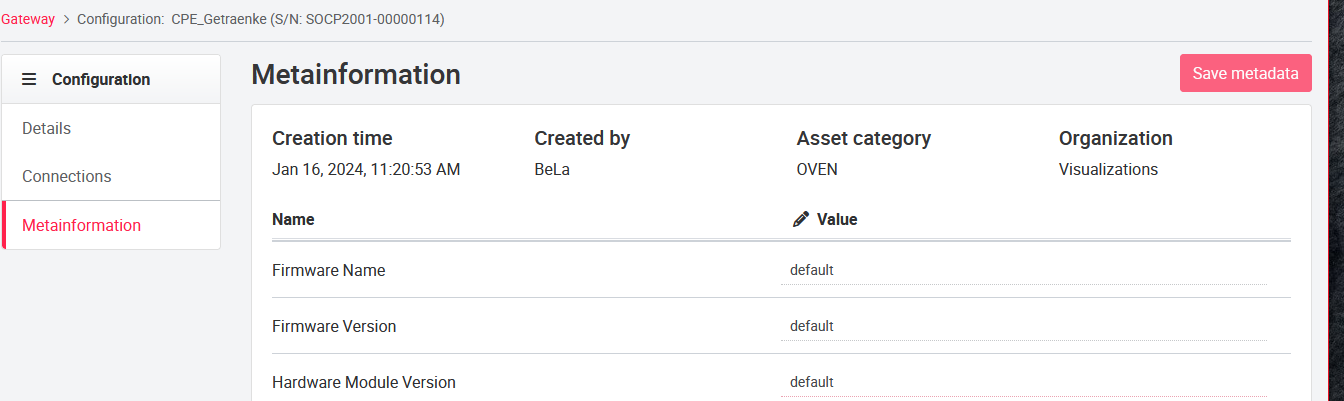
As soon as additional data is added to an asset or gateway via the API, the ’Meta information’ tab is displayed in its configuration. There, the added values can be modified. The available field types for this are:
- text
- number
- dropdown
- checkbox
Information about the time of creation, the creator, the asset category, as well as the organization, is also displayed here. The values are stored in BigQuery, so they are available for easy querying. This feature is only available in the new interface and will be available after the design update.
08.1.5 Preventing long loading times for graphs with many signals
On the user-defined pages, various graphs can be displayed that represent current values of selected signals in real time. Especially with the line graph, long loading times can occur if values of signals from the last two hours should be displayed. Now we have created the possibility that the data is retrieved from another buffer. This should significantly reduce the loading times when there are many signals on the charts. The selection of this cache (InfluxDB) is optional and will be done by the portal operator. Please contact us if this is desired.
08.1.6 Single sign-on with Google SAML provider
For all customers who also use Google for their employees, e.g. with G-Suite and email accounts, there is the option that these users no longer have to log in to our portal interface, but their Google log-in data is used. If, for example, the user is already logged in, all she has to do is call up the URL and she will be taken directly to the overview dashboard. The only requirement is that the users are created in the portal with the same e-mail address.